How to Make a Photo Mosaic: A Complete 2026 Guide
Learn how to make a photo mosaic from your own photos. Step-by-step guide with examples, tips on photo count, image prep, and how to print the finished design.
Posted by
Related reading
Heart-Shaped Photo Mosaic: How to Make One for Valentine's, Anniversary or Engagement
A tutorial for creating a heart-shaped photo mosaic from your photos. Step-by-step guide for Valentine's Day, anniversaries, engagements, weddings, and any romantic gift.
How to Make a Photo Mosaic from Your Instagram Photos (Step-by-Step)
A step-by-step tutorial for turning your Instagram archive into a photo mosaic. How to download every photo, organise them, and generate a mosaic from years of your feed.
Photo Mosaic Poster: Sizes, DPI & How to Print One That Looks Sharp
A complete guide to making a photo mosaic poster. Recommended sizes, DPI requirements, where to print, and how to keep the close-up tile reveal sharp at any size.
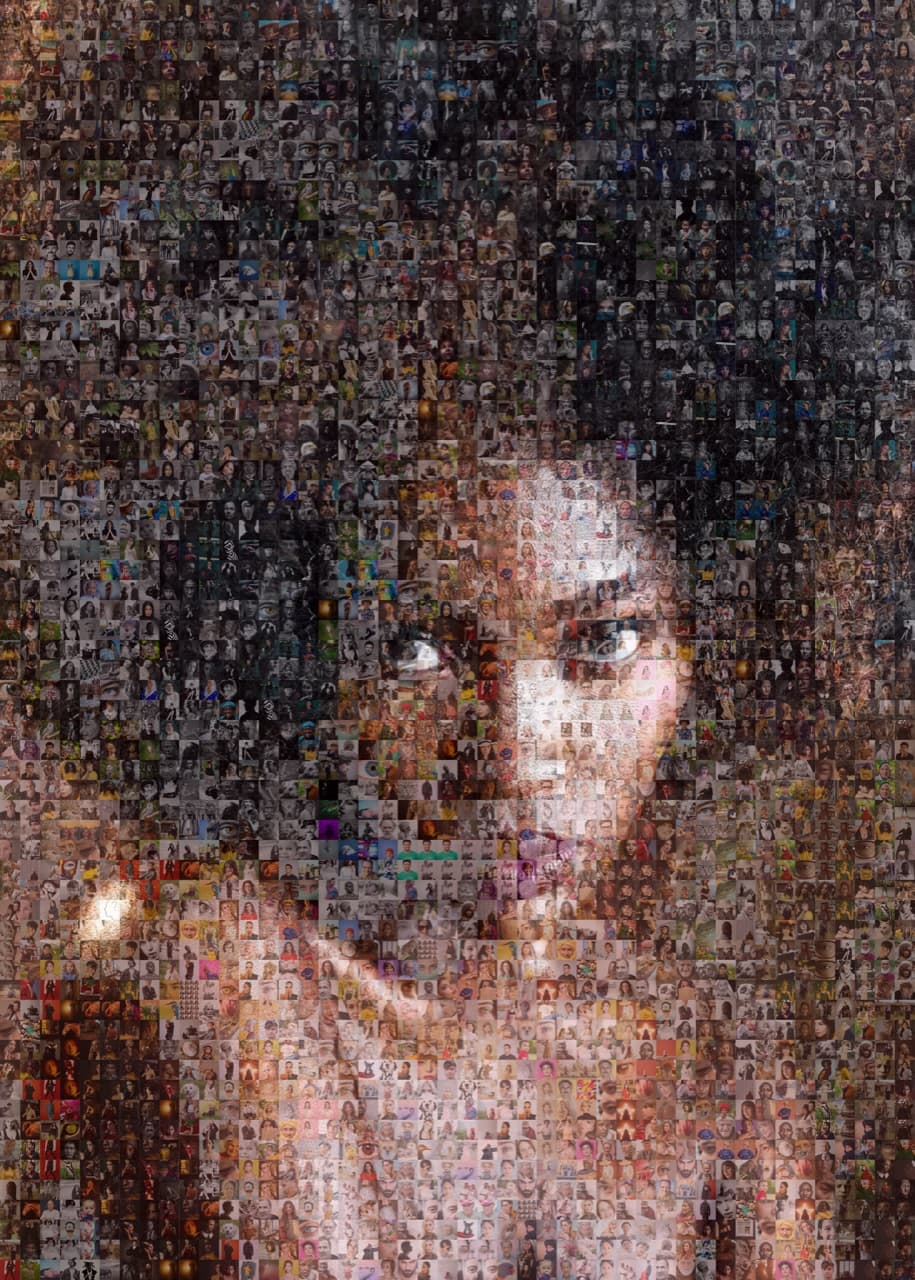
What is a photo mosaic?
A photo mosaic is a single large image built from hundreds or thousands of smaller photos. Stand back and you see one main picture. Step closer and the picture dissolves into the gallery of tiles that make it up. The trick is colour matching: each small photo is placed where its average colour matches the corresponding section of the main image.
That dual-layer effect is why mosaics are such a popular keepsake for weddings, anniversaries, retirements, memorials, and any project where the small details should reward a closer look.
What you need before you start
- One main image. A clear, simple subject works best. Close-up faces, pets, logos, and bold silhouettes hold up far better than busy landscape shots.
- A gallery of tile photos. 100 photos is the practical floor, 200 to 500 is the sweet spot, 1,000 or more gives you near-zero repetition.
- A photo mosaic tool. Doing it manually in Photoshop is possible but extremely slow. Dedicated tools like PicTiler do the colour matching and layout in seconds.
- A plan for the finished piece. Are you printing it on canvas, framing it, sending a digital file, or both? Decide early so you can pick the right output dimensions.
Step 1: Choose the right main image
The single biggest quality lever is your main image. Pick wrong and no amount of tiles will save it. Three rules:
- Simple subject. Big shapes, strong contrast, minimal background clutter.
- Clear focal point. A face fills more of the frame than a wide group shot. Crop in tight.
- High resolution. At least 3 megapixels so it still looks crisp at print size.
Portraits, pets, hands holding rings, single objects, and bold graphic shapes all work beautifully. Crowded scenes, busy patterns, and faraway subjects struggle.

Step 2: Gather your tile photos
You need a pool of photos large enough that the tool can match colours across every region of the main image. The general rule is 150 photos minimum for a small print, 300 to 500 for a high-quality mosaic, and 1,000+ for a large-format poster or canvas with no visible repetition.
Where to pull tile photos from:
- Your camera roll, iCloud, or Google Photos.
- Shared albums and group chats. Ask family or guests to add to a shared folder.
- Social media exports (Instagram, Facebook).
- Old hard drives, USB sticks, and scanned prints.
Aim for variety in colour. A folder of 500 sunset photos will produce a flat mosaic. A folder with bright skies, dark backgrounds, skin tones, greenery, and indoor shots gives the algorithm a full palette to match against.
Ready to make your own photo mosaic?
PicTiler turns your photos into a high-resolution mosaic in minutes. Upload a main image, drop in your gallery, and download a print-ready file. No watermarks on free previews and unlimited tweaks until you love the result.
Try PicTiler freeStep 3: Pick a photo mosaic tool
There are roughly three tiers of tools: free online generators, paid desktop software, and full-service mosaic studios. Free tools like Mosaically, EasyMoza, and Picture Mosaics are fine for small-scale projects. Paid tools like TurboMosaic and Mazaika unlock larger sizes and more control. Studios charge hundreds for hand-crafted results.
PicTiler sits in between. You upload, you control the grid density and colour blending, and you download a print-ready high-resolution file. No watermark, no minimum quantity for prints, no waiting on a studio queue.
Step 4: Generate your mosaic
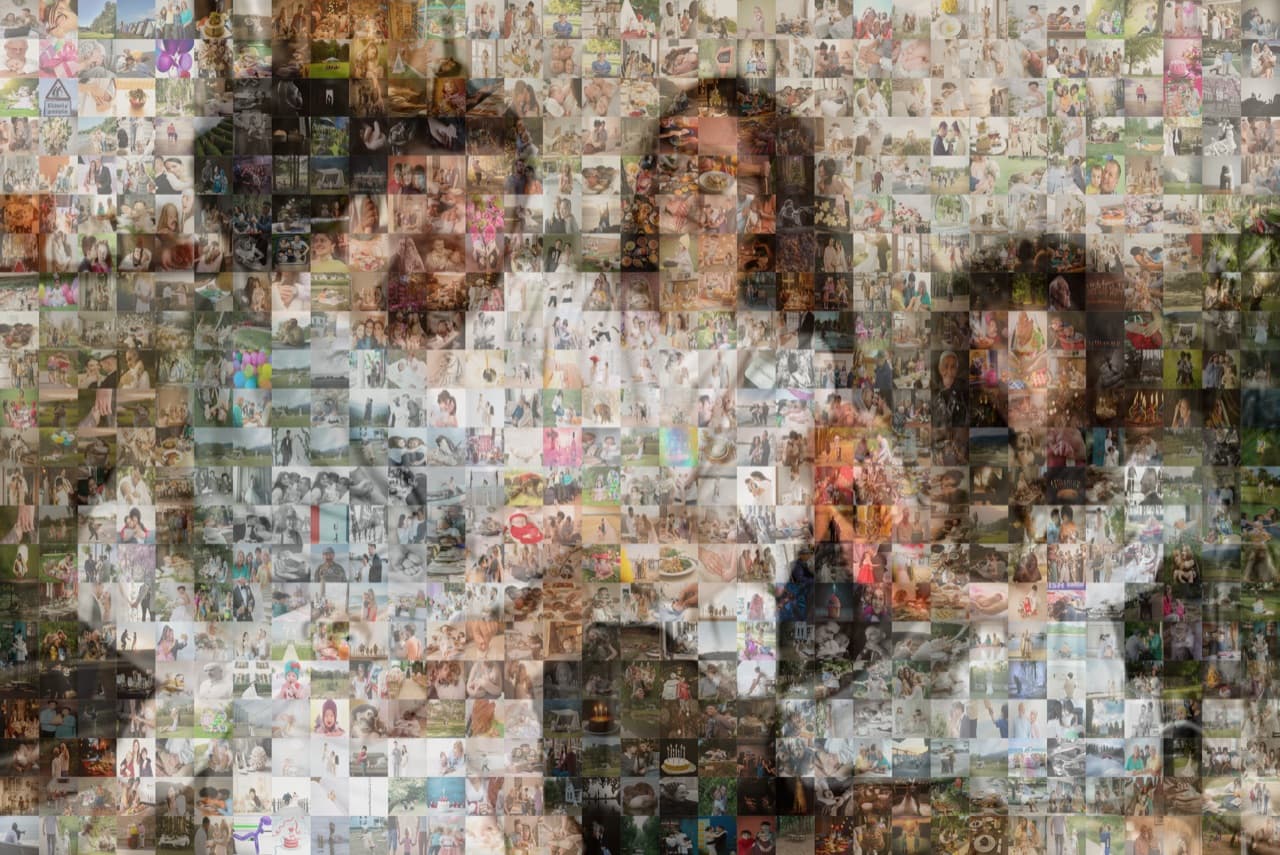
With a tool picked, the actual generation step is fast. Upload your main image, upload your tile gallery, and the tool analyses the colours and arranges the tiles. Most modern tools render a preview in under a minute even with 500 tiles.
The example above uses a family group photo as the main image, with family memories as the tile pool. Notice how the algorithm picks light tiles for skin and faces, darker tiles for shadows, and outdoor shots for the background.
Step 5: Tweak settings until it sings
Almost every mosaic looks better after a couple of small adjustments. The settings that matter:
- Grid density. More tiles means more detail but smaller individual photos. Find the balance for the print size you want.
- Colour blending. A small overlay of the main image makes the mosaic instantly recognisable from a distance, at the cost of muting the individual tiles.
- Tile repetition. Most tools let you cap how often the same photo can be reused. Lower means more variety, higher means closer colour matches.
- Tile shape. Square is the default. Hexagons and circles look distinctive but reduce coverage.
Step 6: Download or order a print
Once you are happy with the preview, export a high-resolution file (300 to 400 dots per inch is the print standard). For a 24x36 inch poster you want at least 7,200 by 10,800 pixels.
Print options to consider:
- Canvas wrap. Warm and gallery-style. Perfect for living rooms.
- Framed matte print. Clean and easy to hang. Good for offices and gifts.
- Metal or acrylic. Bold modern finish, vibrant colours.
- Digital file only. Cheapest option. Print locally with any third-party service.
Common mistakes to avoid
- Not enough tile photos. Anything under 100 will show heavy repetition.
- Busy main image. If you can't describe the main image in five words or fewer, it is too complex.
- Low resolution output. A small JPEG looks great on screen and terrible printed at 24 inches.
- Skipping the tweak step. The first preview is rarely the best version. Iterate.
Final thoughts
A photo mosaic is one of the most personal pieces of art you can make. The hard part is the curation, not the generation. Pick a main image that matters, gather more tile photos than you think you need, and give yourself an hour to play with the settings. The finished piece will outlast every store-bought gift on the shelf.
Ready to make your own photo mosaic?
PicTiler turns your photos into a high-resolution mosaic in minutes. Upload a main image, drop in your gallery, and download a print-ready file. No watermarks on free previews and unlimited tweaks until you love the result.
Try PicTiler free